
Greetings Wargamers and Hobbyists, and welcome to the workshop...don't stand too close to the 'Fission Powered Magnatron', it might just drag all of the iron in your body out through your nostrils...
It has been said on more than one occasion that I talk too much, and the looks I get from my darling wife are pretty unequivocal in letting me know when I have talked for too long about 'hobby stuff', which she herself has a very limited interest in. Today, I would like to show you some actual modelling, as evidence that I do occasionally do more than just talk about the hobby. Sorry if it turns out to be a little bit of a long post, but I hope it's useful someone.

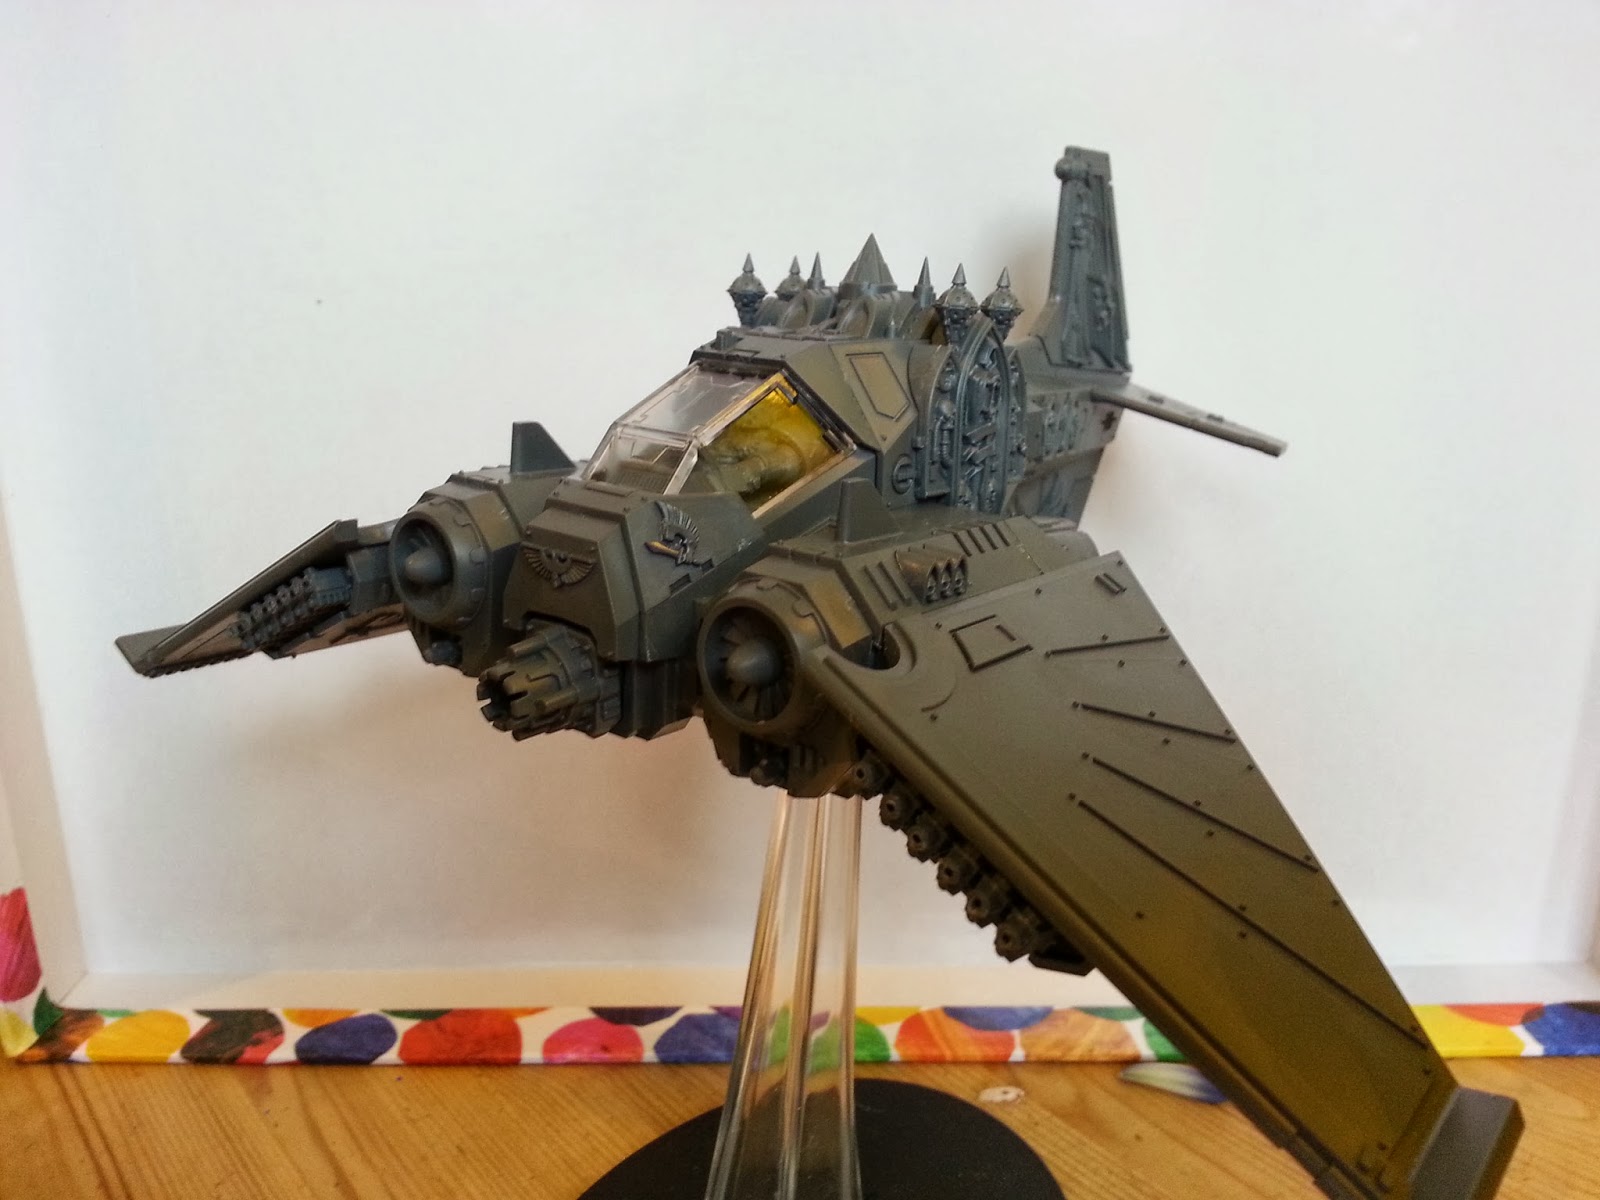
In recent months, since Games Workshop began releasing some truly magnificent large 'dual kits', which for the uninitiated are kits that use a common base to build one of two distinct models, I have picked up two: the Mortis Engine/Coven Throne, a fantastic centrepiece kit for my Vampire Counts Warhammer army, and the Dark Talon/Nephilim Jet fighter kit; a flyer for the Dark Angels Space Marines which allows you to build either a ground attack craft toting some very rare and unusual weaponry (the Dark Talon), and the Nephilim Jet fighter (a superiority fighter with some fearsome anti-infantry firepower as well as being geared up for taking on opposing flyers).
I will state here and now that I am not going to get into a discussion about how effective the Nephilim and Dark Talon are in the game, just that I love the model and both the build options, and that as an obstinate sort of guy, I intend to use both in games as the mood takes me and the opportunity presents itself.
With that out of the way, I'll run quickly through the boring bits so I can then focus on the important bit: the magnetising.
Now you don't need me to tell you about the basics of putting a kit together from cellophane wrapped box to the end of the printed instructions, which from Games Workshop are generally pretty clear and easy to follow, but for completeness:
Clip all of the bits carefully off the sprues. (I know some people prefer to paint 'on sprue' and then assemble, but that's not how I roll. I can just see myself hunting round the edges of each and every piece looking for the 'clipping points' and having to paint them after everything else, so what's the point? Just my preference.
Spend time filing and scraping all the bits, to make sure that everything fits together snugly and you don't end up with a load of visible mould lines when it comes to painting.
Next, have a look at the instructions and work out which bits of the kit are common to both build options, which should be clear from the instructions because they kinda split into two once you start tailoring the kit in one direction or the other, and assemble as far as the 'common build' element is complete in whatever way you typically prefer. I just use super glue, because I find it quicker and easier to rectify mistakes or detach pieces for ease of painting.
Next comes the fun part...playing with magnets.
Tools
Before I continue, there are a few things that I couldn't have done the magnetising without, or at least made life much easier:
A pin vice and drill bit that was the same diameter as my magnets
Modelling putty
Super glue
Rare earth magnets. The are various sizes, but I am using 2mm x 2mm
A quick word about magnets
This may or may not be obvious depending on how much experience you have had with rare earth magents. I have releativly little experience with then, so I'll say it. The magnets will only attract if they are positioned the correct way around. If they aren't, they will repel, and nothing will stay in place. I don't say this to be condescending, I say it because the magents we are working with at small and fiddly and have a life of their own.
It can be hard work handling them and fitting them a particular way around without them flipping round on you, but it is important to get it right. It's easy to work out which way you need to fit a magnet because they will stick. Transferring just one to the model and fixing it in place is the hard part.
Getting Organised
By this point, I had a mostly assembled aircraft, and the bits I needed to sort out and make interchangeable were:
Two tail fin variants
Forward mounted Heavy Bolters/Sensor plates
Under-wing Hurricane Bolters/Black Sword Missiles
Three different nose mounted guns
Stasis Chamber sides/Nephilim sensors
Stasis Chamber top/Nephilim top
Hurricane Bolter ammo feed covers/Dark Talon maneouvering thrusters
Here are some pics of the bits that were magnetised so you can see them all in one place, and so you can refer back, rather than flooding the article with photos.


Here are some pics of the bits that were magnetised so you can see them all in one place, and so you can refer back, rather than flooding the article with photos.
Easy Peasy
So, let's get a head start with a couple of easy items. The tail fins fit into a slot mounted on the top of the tail tightly enough to just pop them in and out without the need to fix them in any more secure way. Ditto the front mounted Heavy Bolters and Sensor plates, which fit snugly into a recess without the need for magnetising. You could magnetise them, but I felt this wasn't necessary and I had more than enough to think about without making work for myself.
Stasis Chamber/Nephelim top
So, the first magnets I fitted were for the top plates for the Stasis Chamber/Nephelim top. To position the magnets, I identified a common point on each of the top plates and the main aircraft body where I could position the magnets. I did quite a bit of checking that the magnet positions would line up before I fixed them in place, because having magnets that don't line up correctly makes the pieces less likely to sit in the right place.
I found that I needed to position the magnet in the main aircraft body where there was essentially just a space, so I used a trick I picked up from my Mortis Engine build: I rolled up some green stuff, stuck it to the inside of the craft, then pushed the first magnet into it until it sat flush with the point where the top plate would meet it. I then fitted magnets to both the top plates. I was able to drill a hole in the Stasis Chamber plate and just push the magnet tight into the hole, but the plate for the Nephilim configuration needed another 'green stuff nest'.

With the push fit magnets a lot depends on how well your drill bit size matches the magnet diameter. Mine was spot on so I didn't need to glue them in place at all. If your hole is a tiny bit big, you may need to glue the magnets in place or use some modelling putty to fill the hole and then push the magnets into that to get a solid fit.
Stasis Chamber side plates & Nephilim Sensors
Thankfully these were easy to do as well. On the backs of each of the four pieces to have magnets fitted, there is a raised locating shape that slots into the main body of the aircraft in a corresponding slot. All I needed to do was drill and fit a magnet in the centre of the locating recess on the aircraft, and then in the centre of the corresponding locating point on the Chamber sides and sensors. The Chamber sides were a 'drill and push' job, and the sensors were a 'fill with green stuff and push' job.

Nose mounted guns
There are three options for guns that fit into the nose mounting point: the Rift Cannon for the Dark Talon, and the Avenger Cannon & Lascannons for the Nephilim. The Lascannon and Avenger Cannon will push fit tightly into the mounting recess, so I found no need to magnetise these.
The Rift Cannon however was more involved, as the piece rests on the front of the mount on a lip, rather than pushing right in like the other two. In addition, there is nowhere inside the mounting point to fit a magnet, just a hole. I rolled up some more green stuff, and used that to fill the hole in the nose mount, pushing it down far enough so that it didn't prevent the Lascannons and Avenger Cannon from being pushed right back inside, and pushed a magnet into it.

Next, as the Rift Cannon doesn't push down into the recess, I had to create a 'mounting column' on the back of the cannon and push a magnet into that, so that the two magnets would actually be able to contact each other when fitted in place. Job done.

Thrusters/ammo cover plates
Here is a bit that took a little thinking about. The thrusters for the Dark Talon build themselves were easy and enjoyable to do because setting them was so straight forward: a hole drilled in the centre of each thruster recess, and a corresponding magnet in the back of each thruster, all of which pushed in tight, no problem.


The ammo cover plates for the Nephilim however are one of the reasons I put this build off for quite a while until I figured out how to do a few things. Because the thruster mounting points all point out at an angle, there is no obvious point where you can mount magnets for the ammo cover; the pieces don't have sufficent contact points, apart from the lip around the edge of the ammo plate where the glue would go if you where fixing them in place.
In the end, I knew I wanted to use two of the four thruster magnets to mount the ammo covers onto, so I used a small ball of green stuff, stuck it to the top end of the back of the ammo cover, and then pressed it down into the recess, so that the green stuff took the shape of the angled thruster mounting point. I wet the green stuff first so it wouldn't stick to the thruster mount. This gave me a mounting point on the back of the ammo cover which matched the shape of the thruster mount where I had fitted the magnets. All I did then was push magnets into the rounded shape in the green stuff, et voila, job done.


Underwing Hurricane Bolters and Missiles - last bit!
This one worked pretty much the same as the nose mounted guns. There was an open recess in the mounting point, with nowhere to mount any magnets, so it was another case of shoving some green stuff inside to create a mounting point for the magnets and pushing one into the centre. I then did a 'drill and push' magnet fit on the back of the Bolter plate, but for the Missile plates, the hole that already exists in the middle of the back of the plate (the reverse of the central missile moulding) is too big for the magnets, so I needed fill the hole with more green stiff and push the magnet into that.


Setting time
One thing I have fund with rare earth magnets green stuff is that the magnets are so strong that until the green stuff has set, another magnet can pull the magnet out of the putty or yank it out of position, spoiling your work positioning the magnets. Once you have finished positioning all the putty mounted magnets, they will all need to sign over night to set, before you can attach and separate them to your hearts content.
Once the green stuff has set, if a magnet does work loose you can just super glue it back in place - making sure it's the right way round of course! You don't want to have to cut a magnet out of the green stuff and have to re-mount it.
I think that's everything. Except one bit; I haven't yet decided what to do about the Stasis Bomb for the Dark Talon, but I think I'll have to mount a magnet in the ridged mounting point on the missile and the corresponding slot on the aircraft body, because there really is nowhere else to put it!


Nephilim top
Nephilim underside
Dark Talon top
Dark Talon underside
I hope some of you have found this post useful. I am happy with the results, and am now ready to get this sucker painted. If anyone has any questions about this project, feel free to drop me a comment and I'll send if I can help.
Until next time, thanks for reading.
P.S. finally decided how to attach the Talon's Stasis Bomb...


P.S. finally decided how to attach the Talon's Stasis Bomb...
No comments:
Post a Comment