Greetings Wargamers and Hobbyists and welcome, after something of a break to my Eternal Workbench.
For this article I am pleased to be able to present my tutorial on how I produced my own cobblestone bases for gaming miniatures. The article is guesting over on the Creative Twilight community blog, so why not head on over and have a read.
Making your own Cobblestone Bases
Thanks for reading, and happy gaming.
Showing posts with label Tutorial. Show all posts
Showing posts with label Tutorial. Show all posts
Thursday, 7 July 2016
Saturday, 28 February 2015
Tutorial: Magnetising for beginners - Harpy/Hive Crone
Greetings wargamers and hobbyists, welcome to the workbench. This is where I make furniture for the house, carry out minor DIY projects, and dissect bio-monstrosities...
This post is going to be something of a tutorial on how to use magnets to allow you to build a model kit in such a way that you can change pieces over between games to represent any of the kit options, rather than building the model as a single fixed model.
I shall state clearly from the outset that this is intended to be a guide for beginners that will help you get to grips with the tools and methods I use to complete a simple magnetising project, only magnetising the pieces you need to in order to get the kit flexibility you want, not an in depth or advanced tutorial to allow you magnetise every single part to the nth degree. I hope however that once you are comfortable with the concepts presented here, you will have the confidence to try more involved projects.
Also, before I begin, everything I show you here is what I do and the tools I use, having worked things out pretty much for myself. Other people may do things differently, and you should feel free to see what other people have done and cherry pick the best advice available and that suits you. Don't take my word as the only option out there.
So, if we all have our goggles on and brain in gear, I'll begin...
First things first:
CONCEPT
A quick question to start, just to make the mission statement clear: why do we want to magnetise a model kit?
Answer, simply, is to allow us to take bits off the model and exchange them for other bits, so that by the time we're done changing bits, the model either has different weapon options on show, or, like the Harpy/Crone kit, can represent a different unit entirely.
Now you don't have to magnetise a kit to be able to use it as another model, all you really have to do is make it clear to your opponent what the model represents before the game starts and use it as a stand-in. As long as your opponent doesn't have an issue with this, and the proxy isn't wildly inappropriate, this is perfectly fine, but of course if you can change bits over by magnetising the kit instead, why wouldn't you?
Thankfully some kits don't need magnetising to change stuff over. Take the Shadowsword kit for example. I can use the tank as any one of half a dozen variants just by changing out the barrel configuration of the main gun, and this can be done by just push fitting the different bits. The moral of this tale is 'don't make work for yourself'. If you don't need to magnetise something to be able to change it round, don't bother.
Lastly, there is another reason to want to magnetise a kit, and that is ease of storage and transport. Some models might be far easier to pack into a box and cart around, as well as taking up less 'volume' in a storage case if you can disassemble it before packing it away.
Next...
KIT PREPARATION
Before we can get into the meat of how to magnetise a kit, I need to say a word about the work you need to do on the model beforehand. This involves looking at the kit you are assembling, going through the stage by stage assembly guide, and picking out the point at which the basic structure of the model is complete, and the guide splits into two or more sections which explain how to complete the build depending on which option you have elected to construct.
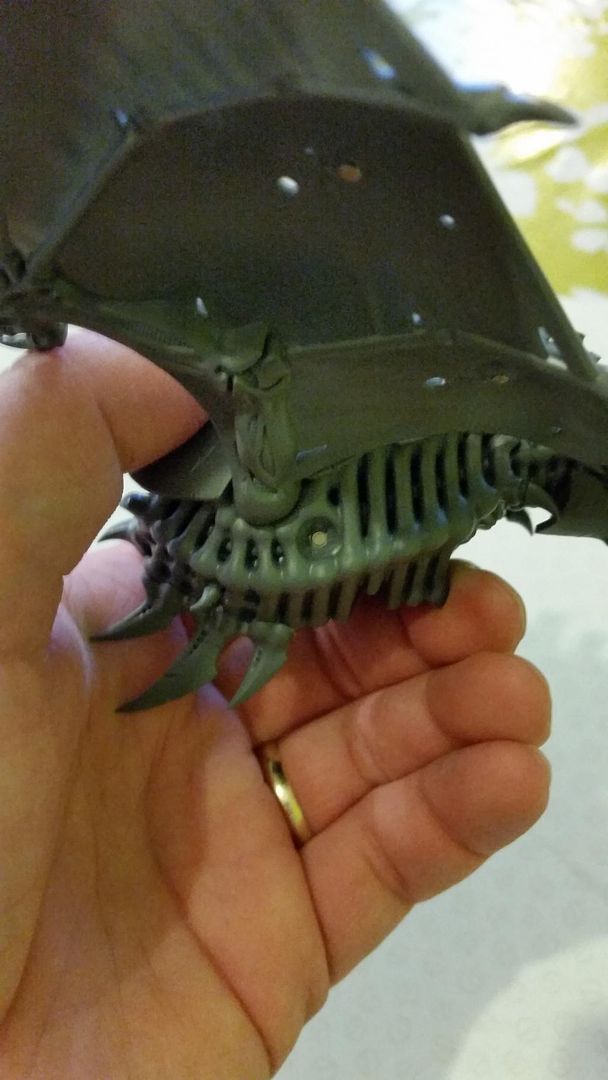
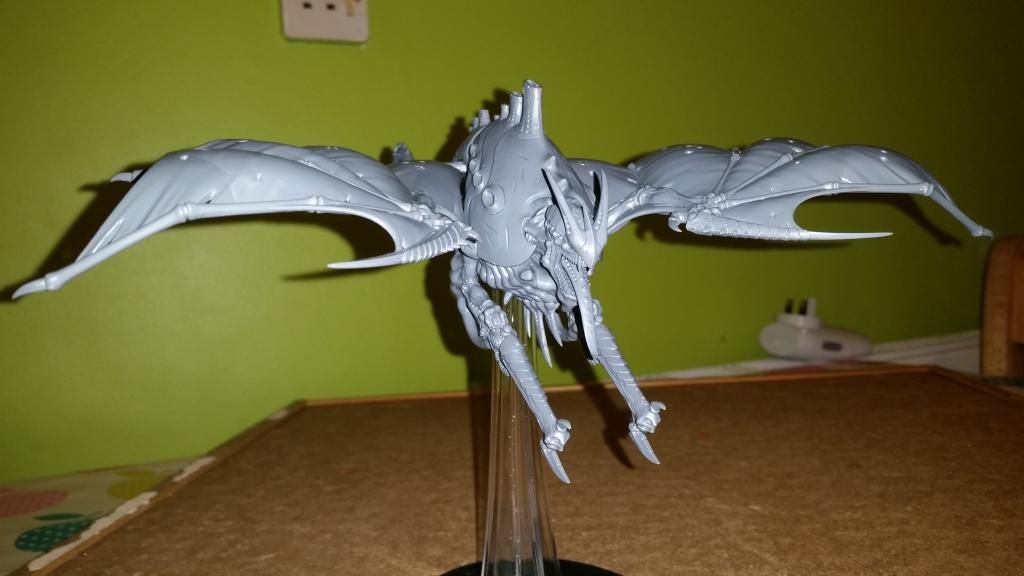
Below are photos of the Harpy/Crone kit assembled to the point where adding anything else takes the kit in one direction or the other. In other words, this is the point you get to where you have completed the assembly of the parts are common to all the options in the kit. The bits you are left with are specific to one build option or another.
Decisions, decisions...
Now I did say that this tutorial is meant to keep things as simple and straight forward as possible, and with that in mind, there may well be bits with some kits that are kind of discretionary when it comes to the need to magnetise them. These tend to be bits that are specific to just one kit option, but don't really affects the overall appearance of the model, and don't form any of the distinct list options, like weapons etc.
Below are some photos of bits I decided to simply choose an option for and glue into place, rather than try and magnetise them. This really was for simplicity's sake. I could have gone all the way and magnetised these bits as well, but that would have taken extra time and also needed a different, additional size of magnet which I would need to purchase for something that doesn't give a huge amount of benefit in the long run. I've seen other tutorials for this kit that did magnetise these bits, and I applaud the dedication of those modellers, but for me, it just wasn't worth the effort.
From left to right, these are: rear talons, tail biomorph, chest bone blades. The reasons I decided to simply choose the bits I liked best and glue them on are as follows:
Rear talons -
The joint on these is just way too small in my opinion to be able to fit magnets at all, they would have to be pinned, which needs wire and alternate drill bits etc. See my rule about not making work for yourself.
Tail biomorph -
This piece could actually be magnetised, but my preferred size of magnet is a little too deep, and the tail may not be able to accommodate it - I would need a shallower magnet. I decided however that it wasn't worth the bother, the expense or the wait to order a pack of smaller magnets just for this piece, so I just glued the tail option I liked into place.
Chest bone blades -
This piece also could be magnetised if I really wanted to, but doing that with the magnets I already had would mean that when the piece wasn't in place, the magnets that hold it in place would be visible, which I wouldn't be happy with. This is because the alternate bits for the other kit option is a series of much smaller spikes, which fit in a different place on the chest. If you look closely you should be able to see that I decided to use both options: the blades, with a couple of the tiny spikes on either side.
So we've made some decisions about bits we are going to glue into place rather than bother to magnetise, and the result is that we have some bits we are not going to use. These are pictured below:
Here we can see the alternative tail piece, the alternative rear talons, the last of the tiny spikes that didn't get used, and the big blade-spikes that go on the top of the carapace. These last bits are the final discretionary assembly decision I made: In order to allow me to magnetise the carapace blades, I would have needed to create greenstuff beds to insert magnets into, which is possible but also time consuming, and as the ability to change these parts over doesn't affect the list options, I decided to take the easy option and glue into place the bits I preferred, pictured below, glued along the flanks of the carapace.
I have done this before on the Nephilim, but those bits were weapon options, and it's not something I would recommend for your first project. I've included photos below so you can see the kind of thing I mean. It's one thing to drill into plastic and glue and magnet in place, and another to have to manufacture a bed to sit the magnets in because there isn't anything but a hole where the pieces go.
TOOLS
so, we've made a few discretionary decisions about what we're going to magnetise and what we aren't, and we've assembled the kit to the point where we're ready to start the magnetising part of the project. Here are the tools I typically use when working on a kit:
Nice and simple. a pin vice, drill bit, green stuff and of course, magnets. It's as as that really. The only other thing you need is super glue, which I assume you will most likely have access to.
Now I have already talked about the use of the green stuff when you need to create a floating bed for a magnet to sit in. I have seen some people use bits if plastic to create elaborate frames that they glue into place to support a magnet, but I thought 'hey, why bother with all the fiddling about. If you aren't going to see it anyway, why not just stuff some putty in the hole?' I like using this method because you can position the magnet while the putty is still soft to make sure you get the depth of the magnets right, which is an important part of the job, and it sticks like concrete when it's set. Like I said though, baby steps.
The most important thing to note about the tools however is this: I use magnets which are the same diameter as the drill bit I use to make the holes the magnets will sit in. On the first project I did, the drill bit I had was a little bigger, so I had to put green stuff in every drill hole to make the magnet sit tight. For the second project I made sure I got myself a drill bit that matched the magnets, and the result was that I could drill the hole, push the magnet in, and in some cases the fit was so snug it didn't even need glue. This makes the whole process much easier and a bit quicker.
As for the magnets themselves, they are neodymium or 'Rare-earth' magnets, and I buy them on ebay, typically in batches of 100. There are a huge variety of different sizes of these magnets, but the one I have settled on as being both small enough to be useful in magnetising most model components, but strong enough to the job, are cylindrical in shape, 2mm in diameter, and 2mm in depth:
Now before I say another word about these magnets,,,WARNING!
THESE ARE BLOODY POWERFUL MAGNETS,
KEEP THEM THE HELL AWAY FROM ELECTRONIC DEVICES LIKE:
SMART PHONES, COMPUTERS, SMART TV'S, PACEMAKERS ETC.
THEY HAVE THE CAPABILITY TO BUGGER STUFF UP!
That bit is important. So when your packet of magnets arrives in the post, don't stuff it in your pocket alongside your expensive smart phone...
Now the only things you really need to know about the magnets apart from their ability to bring down a Titan by screwing up its main cogitator banks, is that, like most magnets I guess, they have two poles: a negative end, and positive end. This means that two magnets will attract if facing the right way round, and repel each other if one of them is the wrong way round.
The final warning that should come on the packaging of your magnets is that you should not file or try to cut the magnets, and you shouldn't need to do this anyway.
THE BUILD
So, we have our tools and magnets, we've assembled all the common components of the multi-option kit, and we've perhaps made a few decisions about bits we are going to glue into place rather than try and magnetise, for the reasons discussed earlier. We are ready to start installing magnets.
Below are two photos. The bits on the left are the Harpy bits which have had magnets installed, and the bits on the right are for the Hive Crone.

If you look closely, you can see the magnets installed in the various bits - they are the shiny metallic discs. The top pieces in each set of bits are the head and tail. below you can see the arms, and on the Crone photo you can see the Tentaclids. Each piece has a single magnet installed.
 The installation of a magnet is as follows: Using your drill bit which is the same diameter as your magnets (in my case a 2mm bit for my 2mm magnets), you position the tip of the bit in the location you want the magnet to sit, and you start off very slowly to make sure the location of the hole doesn't drift. The reason for this is that the magnet in the bits above needs to match the location of the magnet on the main body of the model, otherwise the bits won't sit in the right position, either falling off altogether, or not sitting right because the magnets are misaligned and are pulling the piece to one side and out of place.
It is important that you get this right, but it is just a case of taking your time. Once you have fitted your first few magnets, you'll be more comfortable.
Once you have your hole, it needs to be deep enough to allow the magnet to sit with the surface flush with the surface of the piece. It doesn't matter if you drill the hole too deep (unless that means it pushes right through and out of the other side of the piece, making it look like it took a hit from a Lascannon), because when you push the magnet into the hole, you will only push it until the surface sits flush, not deep into the hole. The idea is to position the magnets on each piece so that when the pieces are in place, the magnets sit in contact with each other and hold the pieces together.
In some cases the hole will be tight enough so that the magnet pushes in snugly and stays put. If the hole is not quite that tight, you will need to prime the hole with a dab of super glue to make sure the magnet stays where it is once it's in the hole. If you don't glue the magnet in when the hole isn't quite tight enough to hold it without, then when you fit the corresponding piece, the magnet in the other bit will pull the magnet back out of its hole, which of course is no good. Getting the holes, and therefore the magnets, in the right place is probably the single most important part of a magnetising project.
Now I'll show you where on the main model I positioned the corresponding magnets.
First, the head. This is where I put the magnet in the neck cavity:
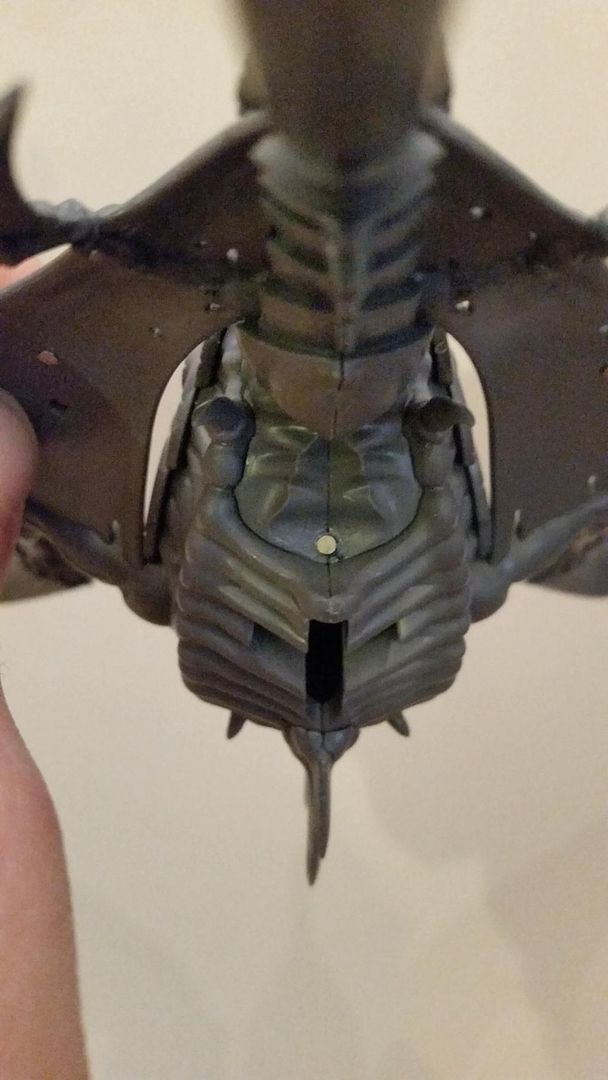
You can clearly see the face of the magnet in the back of the cavity, and it sits flush with the surface of the plastic. Now when you are setting up magnets to make a part interchangeable, like the head for example, and the parts you are fitting the magnets don't give you obvious matching points, then you need to work out how to mark on the heads and the 'neck' where the magnets need to go so they line up correctly.
One way of doing this is to test fit the parts together to work out where you will have nice large contact points between the parts, before deciding where to position the magnets. There is no use in installing magnets in bits that don't meet. I worked on the idea that putting the one 'receiving' magnet in the main body of kit first would make sense, because that is the one that the magents in the two heads would need to match up to. I chose a spot in the back of the neck cavity I thought gave a good contact point, and I drilled a 2mm hole using the 2mm drill bit. Once this was done I added a touch of superglue to the hole, and pushed a magnet in until the top surface of the magnet finished up flush with the surface of the plastic of the neck cavity. If you have used a touch of superglue, then you can keep pushing until the magnet is in position, and when you stop, the glue will hold the magnet fast, so don't stop pushing till the magnet is flush.
Next comes marking where you need to drill the holes in the heads. To make sure that the magnets in the heads would both be positioned to align with the magnet in the neck cavity, I did this by putting a dab of paint on the magnet I had installed in the neck cavity, and then pushed one of the heads into the cavity. This left a spot of paint on the back of the head where it aligned with the magnet in the neck, giving me the spot I needed to drill the hole. I then of course repeated this with the other head.
Earlier I mentioned the poles of the magnets. Now is the time I had to make sure that once I had drilled the holes in the two heads, I installed the magnets the right way round so they would attract to the magnet in the neck, and not repel.
Now these magnets are very fiddly things, and the way I have worked out is the easiest for me to pick up a magnet, make sure it's the right way round, and then get it into its hole is as follows:
And the wings - for the Tentaclids:
Now if you look at the photo that shows the Crone pieces earlier, you'll see that after much deliberation I decided to glue the Tentaclids to their 'mounting points' and then magnetise the whole thing to the underside of the wing. I did this for two reasons. First, magnetising the Tentaclids to the mounting points was not practical, and I preferred not to have the mounting points glued on the model when it was set up as the Harpy, because it would look like the Harpy had fired off a load of Tentaclids it didn't have in the first place.
I think it makes little difference to the model to remove the whole Tentaclid and its mounting point when it has been fired in game, because it's fitted under the wing. The main thing is being able to remove the Tentaclid, so that you can remove them as they are fired, and take them all off when switching to 'Harpy mode'. As luck would have it, the little holes in the back of the Tentaclid mounting points are exactly 2mm in diameter, so it was no brainer really as they came pre-drilled!
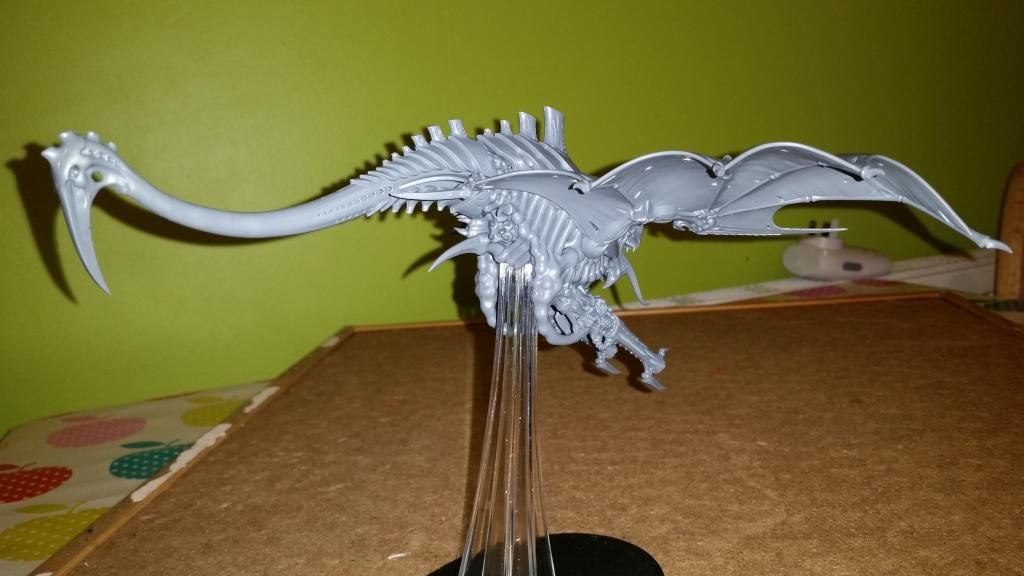
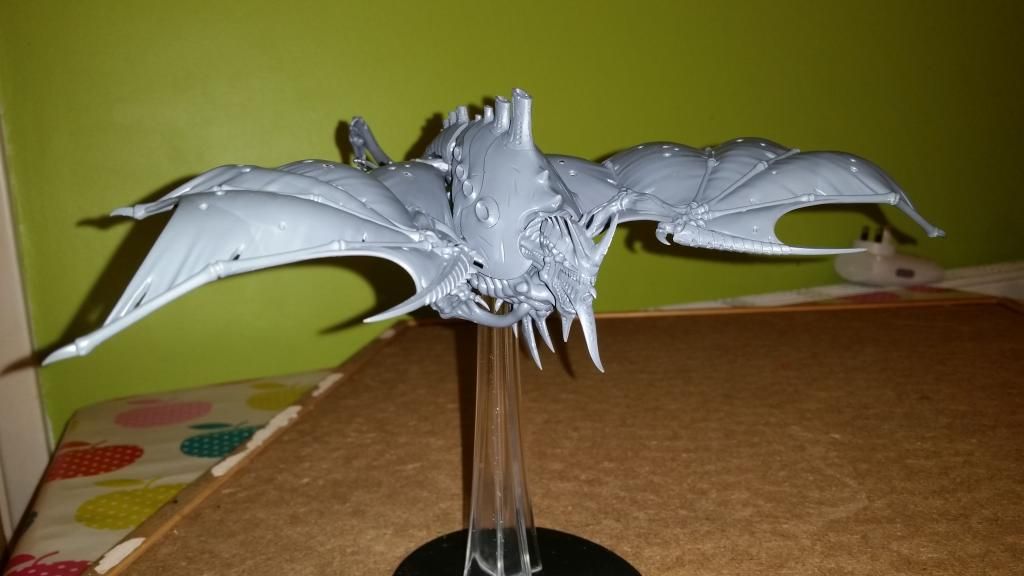
Here are the photos of the kit set up as the two options once all the magnets were in place. First, the Harpy:
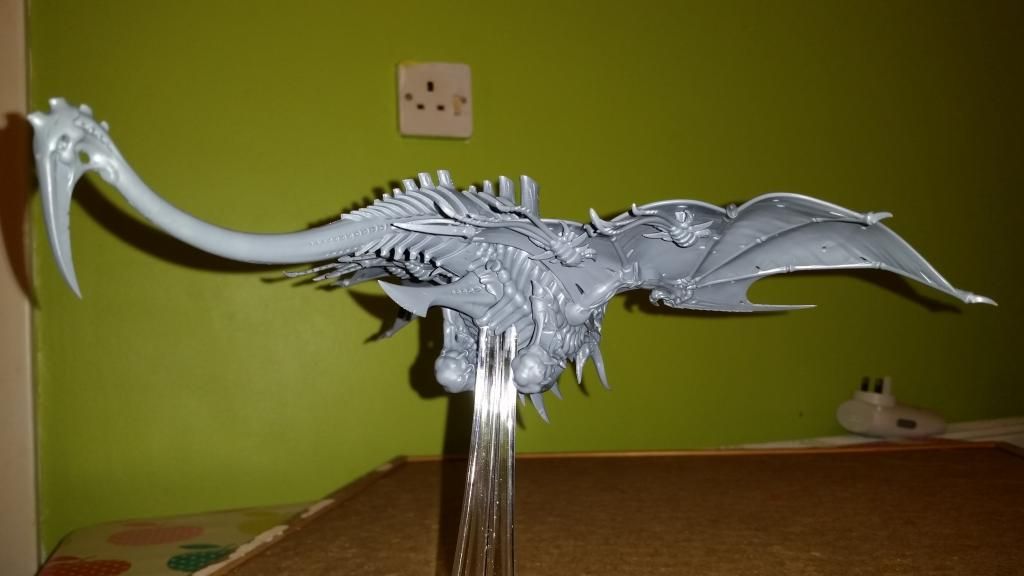
And now the Crone:
Just a couple of hints below:
I hope that this article is of use. Please feel free to ask questions or suggest any points I haven't covered which might be good to add in. I haven't gone through the fitting of every piece individually, because the principles are the same pretty much every time, and I hope the photos of all the pieces and their magnet positions will be enough, plus, the article would be three times longer.
Take your time with your first attempt. Once you have successfully installed your first couple and your brain has accepted the programming, it becomes much easier.
Good luck, and thanks for reading...
P.S. As of this morning, my painting total for this year stands at 66 painted infantry models out of a target of 40!
You can clearly see the face of the magnet in the back of the cavity, and it sits flush with the surface of the plastic. Now when you are setting up magnets to make a part interchangeable, like the head for example, and the parts you are fitting the magnets don't give you obvious matching points, then you need to work out how to mark on the heads and the 'neck' where the magnets need to go so they line up correctly.
One way of doing this is to test fit the parts together to work out where you will have nice large contact points between the parts, before deciding where to position the magnets. There is no use in installing magnets in bits that don't meet. I worked on the idea that putting the one 'receiving' magnet in the main body of kit first would make sense, because that is the one that the magents in the two heads would need to match up to. I chose a spot in the back of the neck cavity I thought gave a good contact point, and I drilled a 2mm hole using the 2mm drill bit. Once this was done I added a touch of superglue to the hole, and pushed a magnet in until the top surface of the magnet finished up flush with the surface of the plastic of the neck cavity. If you have used a touch of superglue, then you can keep pushing until the magnet is in position, and when you stop, the glue will hold the magnet fast, so don't stop pushing till the magnet is flush.
Next comes marking where you need to drill the holes in the heads. To make sure that the magnets in the heads would both be positioned to align with the magnet in the neck cavity, I did this by putting a dab of paint on the magnet I had installed in the neck cavity, and then pushed one of the heads into the cavity. This left a spot of paint on the back of the head where it aligned with the magnet in the neck, giving me the spot I needed to drill the hole. I then of course repeated this with the other head.
Earlier I mentioned the poles of the magnets. Now is the time I had to make sure that once I had drilled the holes in the two heads, I installed the magnets the right way round so they would attract to the magnet in the neck, and not repel.
Now these magnets are very fiddly things, and the way I have worked out is the easiest for me to pick up a magnet, make sure it's the right way round, and then get it into its hole is as follows:
- Let one of the magnets stick to the magnet you have already installed - in this case, the neck cavity. This ensures that the magnet is the right way around, and it holds the magnet in place, without needing to try and remove it from its position, which can be tricky while keeping it the right way round.
- Put a dab of superglue in the hole that the magnet is going into - in this case in the back of the head.
- Push the head down into the cavity so that the magnet goes into the hole, and keep pushing until the head is sitting fully into the cavity.
- Wait a minute for the glue to fix the magnet in the hole.
- Pull the head away from the neck cavity.
If everything goes as it should, this should leave the magnet in the neck cavity in its hole, and the newly installed magnet in the back of the head in its hole, with both magnets the right way round and a snug fit of the parts. Now at this stage if you find that the magnet in the back of the head isn't quite flush with the surface of the plastic, either protruding a fraction or pushed in a little, don't worry, because if it's only a fraction and the two pieces were firmly pushed together, it doesn't matter. The main thing it that the magnets are firmly fixed in place, and that the two model parts fit snugly together.
Rinse and repeat with the other head. Once this stage is complete, you should now be able to put either of the two heads in place and it should stay in place, and you should be able to swap them over.
So now we have established the process for installing magnets, using dabs of paint to make sure that all the parts align together, and how to make sure the magnets go in the right way around, you simply repeat the process with the rest of the parts.
The photos below show you where I installed the magnets on the rest of the kit:
First, the 'arm holes':
And the tail:
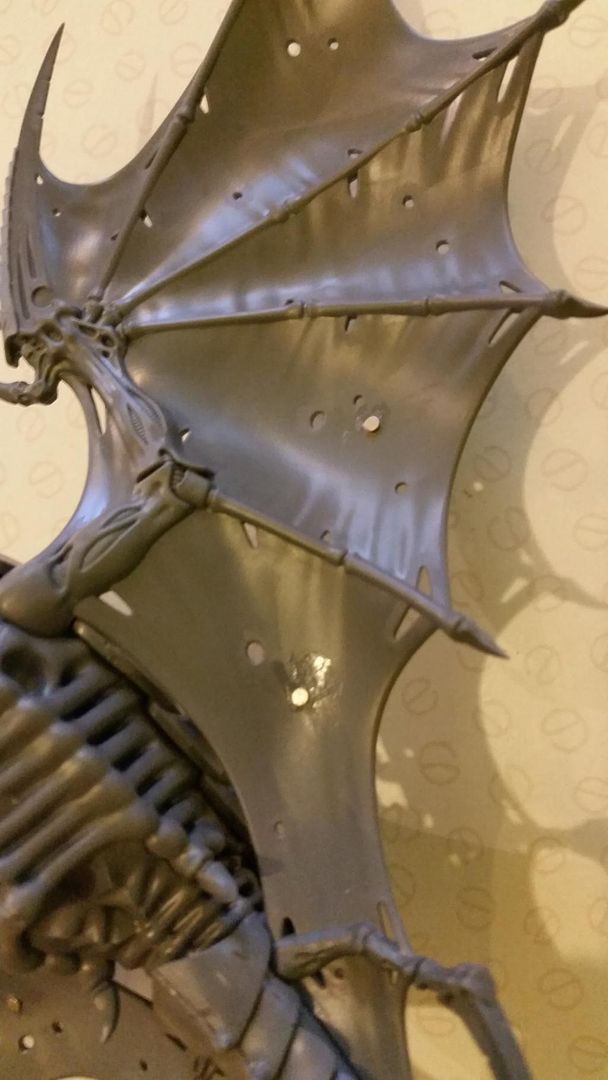
And the wings - for the Tentaclids:
Now if you look at the photo that shows the Crone pieces earlier, you'll see that after much deliberation I decided to glue the Tentaclids to their 'mounting points' and then magnetise the whole thing to the underside of the wing. I did this for two reasons. First, magnetising the Tentaclids to the mounting points was not practical, and I preferred not to have the mounting points glued on the model when it was set up as the Harpy, because it would look like the Harpy had fired off a load of Tentaclids it didn't have in the first place.
I think it makes little difference to the model to remove the whole Tentaclid and its mounting point when it has been fired in game, because it's fitted under the wing. The main thing is being able to remove the Tentaclid, so that you can remove them as they are fired, and take them all off when switching to 'Harpy mode'. As luck would have it, the little holes in the back of the Tentaclid mounting points are exactly 2mm in diameter, so it was no brainer really as they came pre-drilled!
Here are the photos of the kit set up as the two options once all the magnets were in place. First, the Harpy:
And now the Crone:
Just a couple of hints below:
- Dry fit pieces before super gluing either pieces or magnets in place - it's not an easy thing to get a superglued magnet out a hole.
- Avoid pushing a magnet through the hole you have drilled in a piece that has a closed cavity, like the head. Once inside, you won't get it out without cutting your model apart (so it pays to have plenty of magnets), and your model will make a nice rattling sound as it flies around the table.
- One for the Harpy/Crone kit specifically - glue the tongue in place BEFORE you glue the two sides of the head together - it won't fit past the teeth afterwards!
I hope that this article is of use. Please feel free to ask questions or suggest any points I haven't covered which might be good to add in. I haven't gone through the fitting of every piece individually, because the principles are the same pretty much every time, and I hope the photos of all the pieces and their magnet positions will be enough, plus, the article would be three times longer.
Take your time with your first attempt. Once you have successfully installed your first couple and your brain has accepted the programming, it becomes much easier.
Good luck, and thanks for reading...
P.S. As of this morning, my painting total for this year stands at 66 painted infantry models out of a target of 40!
Sunday, 23 February 2014
Magnetising the 'Dark Nephilim'...
Greetings Wargamers and Hobbyists, and welcome to the workshop...don't stand too close to the 'Fission Powered Magnatron', it might just drag all of the iron in your body out through your nostrils...
It has been said on more than one occasion that I talk too much, and the looks I get from my darling wife are pretty unequivocal in letting me know when I have talked for too long about 'hobby stuff', which she herself has a very limited interest in. Today, I would like to show you some actual modelling, as evidence that I do occasionally do more than just talk about the hobby. Sorry if it turns out to be a little bit of a long post, but I hope it's useful someone.
In recent months, since Games Workshop began releasing some truly magnificent large 'dual kits', which for the uninitiated are kits that use a common base to build one of two distinct models, I have picked up two: the Mortis Engine/Coven Throne, a fantastic centrepiece kit for my Vampire Counts Warhammer army, and the Dark Talon/Nephilim Jet fighter kit; a flyer for the Dark Angels Space Marines which allows you to build either a ground attack craft toting some very rare and unusual weaponry (the Dark Talon), and the Nephilim Jet fighter (a superiority fighter with some fearsome anti-infantry firepower as well as being geared up for taking on opposing flyers).
I will state here and now that I am not going to get into a discussion about how effective the Nephilim and Dark Talon are in the game, just that I love the model and both the build options, and that as an obstinate sort of guy, I intend to use both in games as the mood takes me and the opportunity presents itself.
With that out of the way, I'll run quickly through the boring bits so I can then focus on the important bit: the magnetising.
Now you don't need me to tell you about the basics of putting a kit together from cellophane wrapped box to the end of the printed instructions, which from Games Workshop are generally pretty clear and easy to follow, but for completeness:
Clip all of the bits carefully off the sprues. (I know some people prefer to paint 'on sprue' and then assemble, but that's not how I roll. I can just see myself hunting round the edges of each and every piece looking for the 'clipping points' and having to paint them after everything else, so what's the point? Just my preference.
Spend time filing and scraping all the bits, to make sure that everything fits together snugly and you don't end up with a load of visible mould lines when it comes to painting.
Next, have a look at the instructions and work out which bits of the kit are common to both build options, which should be clear from the instructions because they kinda split into two once you start tailoring the kit in one direction or the other, and assemble as far as the 'common build' element is complete in whatever way you typically prefer. I just use super glue, because I find it quicker and easier to rectify mistakes or detach pieces for ease of painting.
Next comes the fun part...playing with magnets.
Tools
Before I continue, there are a few things that I couldn't have done the magnetising without, or at least made life much easier:
A pin vice and drill bit that was the same diameter as my magnets
Modelling putty
Super glue
Rare earth magnets. The are various sizes, but I am using 2mm x 2mm
A quick word about magnets
This may or may not be obvious depending on how much experience you have had with rare earth magents. I have releativly little experience with then, so I'll say it. The magnets will only attract if they are positioned the correct way around. If they aren't, they will repel, and nothing will stay in place. I don't say this to be condescending, I say it because the magents we are working with at small and fiddly and have a life of their own.
It can be hard work handling them and fitting them a particular way around without them flipping round on you, but it is important to get it right. It's easy to work out which way you need to fit a magnet because they will stick. Transferring just one to the model and fixing it in place is the hard part.
Getting Organised
By this point, I had a mostly assembled aircraft, and the bits I needed to sort out and make interchangeable were:
Two tail fin variants
Forward mounted Heavy Bolters/Sensor plates
Under-wing Hurricane Bolters/Black Sword Missiles
Three different nose mounted guns
Stasis Chamber sides/Nephilim sensors
Stasis Chamber top/Nephilim top
Hurricane Bolter ammo feed covers/Dark Talon maneouvering thrusters
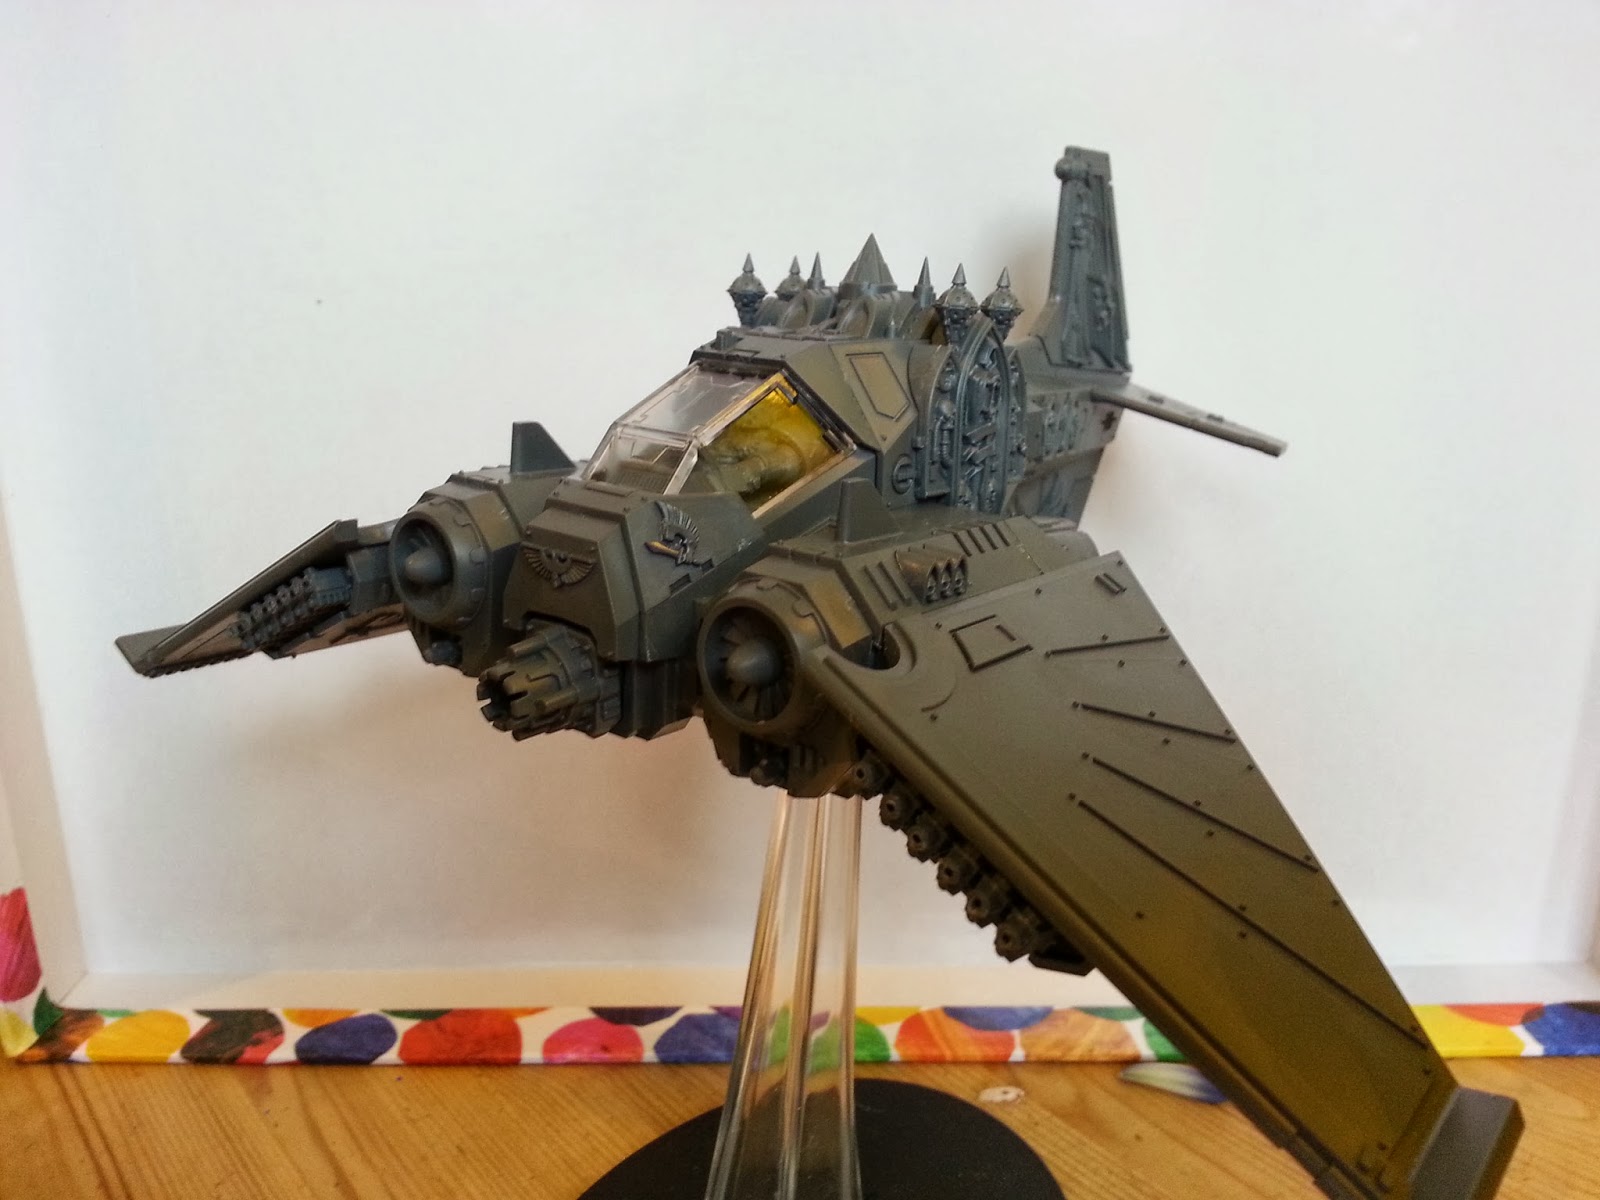
Here are some pics of the bits that were magnetised so you can see them all in one place, and so you can refer back, rather than flooding the article with photos.
Here are some pics of the bits that were magnetised so you can see them all in one place, and so you can refer back, rather than flooding the article with photos.
Easy Peasy
So, let's get a head start with a couple of easy items. The tail fins fit into a slot mounted on the top of the tail tightly enough to just pop them in and out without the need to fix them in any more secure way. Ditto the front mounted Heavy Bolters and Sensor plates, which fit snugly into a recess without the need for magnetising. You could magnetise them, but I felt this wasn't necessary and I had more than enough to think about without making work for myself.
Stasis Chamber/Nephelim top
So, the first magnets I fitted were for the top plates for the Stasis Chamber/Nephelim top. To position the magnets, I identified a common point on each of the top plates and the main aircraft body where I could position the magnets. I did quite a bit of checking that the magnet positions would line up before I fixed them in place, because having magnets that don't line up correctly makes the pieces less likely to sit in the right place.
I found that I needed to position the magnet in the main aircraft body where there was essentially just a space, so I used a trick I picked up from my Mortis Engine build: I rolled up some green stuff, stuck it to the inside of the craft, then pushed the first magnet into it until it sat flush with the point where the top plate would meet it. I then fitted magnets to both the top plates. I was able to drill a hole in the Stasis Chamber plate and just push the magnet tight into the hole, but the plate for the Nephilim configuration needed another 'green stuff nest'.
With the push fit magnets a lot depends on how well your drill bit size matches the magnet diameter. Mine was spot on so I didn't need to glue them in place at all. If your hole is a tiny bit big, you may need to glue the magnets in place or use some modelling putty to fill the hole and then push the magnets into that to get a solid fit.
Stasis Chamber side plates & Nephilim Sensors
Thankfully these were easy to do as well. On the backs of each of the four pieces to have magnets fitted, there is a raised locating shape that slots into the main body of the aircraft in a corresponding slot. All I needed to do was drill and fit a magnet in the centre of the locating recess on the aircraft, and then in the centre of the corresponding locating point on the Chamber sides and sensors. The Chamber sides were a 'drill and push' job, and the sensors were a 'fill with green stuff and push' job.
Nose mounted guns
There are three options for guns that fit into the nose mounting point: the Rift Cannon for the Dark Talon, and the Avenger Cannon & Lascannons for the Nephilim. The Lascannon and Avenger Cannon will push fit tightly into the mounting recess, so I found no need to magnetise these.
The Rift Cannon however was more involved, as the piece rests on the front of the mount on a lip, rather than pushing right in like the other two. In addition, there is nowhere inside the mounting point to fit a magnet, just a hole. I rolled up some more green stuff, and used that to fill the hole in the nose mount, pushing it down far enough so that it didn't prevent the Lascannons and Avenger Cannon from being pushed right back inside, and pushed a magnet into it.
Next, as the Rift Cannon doesn't push down into the recess, I had to create a 'mounting column' on the back of the cannon and push a magnet into that, so that the two magnets would actually be able to contact each other when fitted in place. Job done.
Thrusters/ammo cover plates
Here is a bit that took a little thinking about. The thrusters for the Dark Talon build themselves were easy and enjoyable to do because setting them was so straight forward: a hole drilled in the centre of each thruster recess, and a corresponding magnet in the back of each thruster, all of which pushed in tight, no problem.
The ammo cover plates for the Nephilim however are one of the reasons I put this build off for quite a while until I figured out how to do a few things. Because the thruster mounting points all point out at an angle, there is no obvious point where you can mount magnets for the ammo cover; the pieces don't have sufficent contact points, apart from the lip around the edge of the ammo plate where the glue would go if you where fixing them in place.
In the end, I knew I wanted to use two of the four thruster magnets to mount the ammo covers onto, so I used a small ball of green stuff, stuck it to the top end of the back of the ammo cover, and then pressed it down into the recess, so that the green stuff took the shape of the angled thruster mounting point. I wet the green stuff first so it wouldn't stick to the thruster mount. This gave me a mounting point on the back of the ammo cover which matched the shape of the thruster mount where I had fitted the magnets. All I did then was push magnets into the rounded shape in the green stuff, et voila, job done.
Underwing Hurricane Bolters and Missiles - last bit!
This one worked pretty much the same as the nose mounted guns. There was an open recess in the mounting point, with nowhere to mount any magnets, so it was another case of shoving some green stuff inside to create a mounting point for the magnets and pushing one into the centre. I then did a 'drill and push' magnet fit on the back of the Bolter plate, but for the Missile plates, the hole that already exists in the middle of the back of the plate (the reverse of the central missile moulding) is too big for the magnets, so I needed fill the hole with more green stiff and push the magnet into that.
Setting time
One thing I have fund with rare earth magnets green stuff is that the magnets are so strong that until the green stuff has set, another magnet can pull the magnet out of the putty or yank it out of position, spoiling your work positioning the magnets. Once you have finished positioning all the putty mounted magnets, they will all need to sign over night to set, before you can attach and separate them to your hearts content.
Once the green stuff has set, if a magnet does work loose you can just super glue it back in place - making sure it's the right way round of course! You don't want to have to cut a magnet out of the green stuff and have to re-mount it.
I think that's everything. Except one bit; I haven't yet decided what to do about the Stasis Bomb for the Dark Talon, but I think I'll have to mount a magnet in the ridged mounting point on the missile and the corresponding slot on the aircraft body, because there really is nowhere else to put it!
Nephilim top
Nephilim underside
Dark Talon top
Dark Talon underside
I hope some of you have found this post useful. I am happy with the results, and am now ready to get this sucker painted. If anyone has any questions about this project, feel free to drop me a comment and I'll send if I can help.
Friday, 31 January 2014
Glue: Sprue Cutters Union #26
Greetings Wargamers and Hobbyists, and welcome once more to the workshop.
This week the members of the Sprue Cutters Union (#spruecutters) have been asked a rather sticky question, one which I am sure we each have our horror stories about...
- What glue(s) do you use, and how do you apply them? -
Well, this is a very simple one for me, because I only use one kind of glue...Loctite Super Glue with brush applicator.
This reasoning behind this has come about over an extended period, bearing in mind that it will be twenty one years with the coming of February's issue of White Dwarf since I began in the hobby of miniature wargaming, not counting a couple of years or so with HeroQuest and Space Crusade before that, so I have been through some glue in my time.
I use superglue because it sticks fast, which is great when you have an entire army to build, and when I started out in the hobby, most of my minis are wholly or partially metal, so Super Glue is the obvious choice for that reason as well. Its 'rapid reaction' also makes it good for impromptue field repairs for that inevitable damage in transit on the way to a games night.
The reason I use super glue instead of poly cement for my plastics is two-fold: superglue sticks faster, and you can take models apart again later to help with painting. You can also take apart models that are glued with cement, but that requires the use of a chain axe...
The reason I use super glue instead of poly cement for my plastics is two-fold: superglue sticks faster, and you can take models apart again later to help with painting. You can also take apart models that are glued with cement, but that requires the use of a chain axe...
You might think that this was enough to answer the question, and I guess it is, but the inner workings of my cogitator is never as simple as that, no sir it isn't.
I guess I could say a few words about using the particular glue I use. Quite simply, the reasons are as follows:
- You get what you pay for in my experience. For something that you might only buy once or twice each year, why skimp, when a decent brand of glue might save a year of headaches?
- I find the brush applicator to give the best control over where the sometimes tiny quantities of glue end up. I have heard good things about nozzle applied gel super glue, also by Loctite, but I can say for certain that the humble foil tube gives about as much control as a scale modeller at a 99% discount kit sale the day after pay day.
- When using a bottle of liquid super glue, whether a brush applicator or not, always store it upright. Never let it lie on it's side, even for a couple of hours. I learned to my cost a couple of times how quickly bottles will glue their lids on tighter than a Dwarf misers purse strings. Don't do it. It's not that you then have to pay out to replace what could well be half a bottle of glue, it's the inconvenience of coming to use the glue, and finding you can't because the son of a nutcracker won't open without a hacksaw.
- Last tip. Superglue has a shelf life, so when you start to find that the glue is getting lazy, starting to congeal and plainly just isn't doing it's job as well as it did when it was new, just resign it to the Great Hobby Heaven in the sky and buy a new one. As I already said, it isn't worth quibbling over a few quid when you only by two or three bottles each year, and you can lose hours removing, cleaning and re-gluing the same piece over and over because the glue has decided to play silly beggars. Just buy a new one.
So, there are my thoughts on which glue and how it is applied, and a few pointers I have picked up while using it. Let me know if you get stuck with any of them...
If you would like to read more posts on this same topic by a variety of miniature modellers, I invite you to have a look through the links below to the blogs of other Union Members, and to the main Topic Hub over at the Combat Workshop, where more members will post their links.
I also invite you to check out this link, which explains how you too could become a Sprue Cutters Union member. All you need is a blog of your own, whether you are a seasoned blogger or would like to start one for the for the first time, and more importantly you need a passion for miniature modelling of one kind or another. We are indeed a varied bunch...
Thanks for reading.
P.S. Here are a couple of photos of my completed Chaos Warriors, The Unleashed...next time, something quite different.
Subscribe to:
Posts (Atom)


